Automated Version Control
Figure 1

Figure 2

Figure 3

Setting Up Git
Creating a Repository
Figure 1
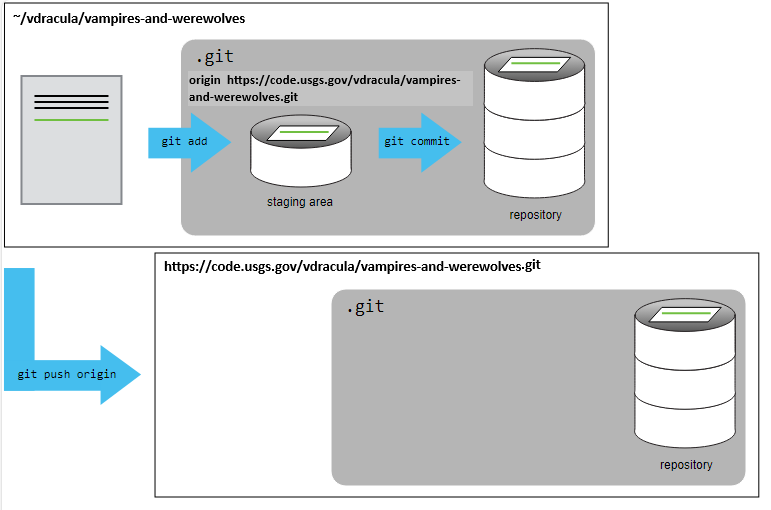
Tracking Changes
Figure 1
Figure 2

Figure 3

Ignoring Things
Figure 1
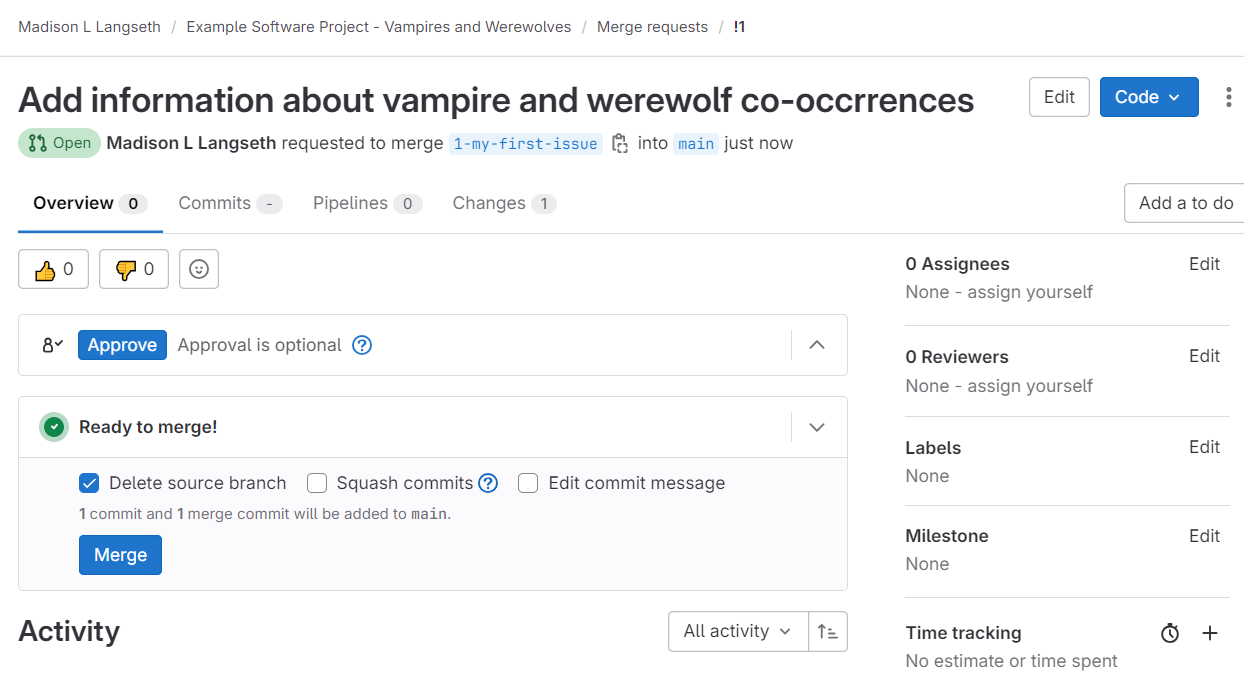
Remotes in GitLab
Figure 1

Figure 2
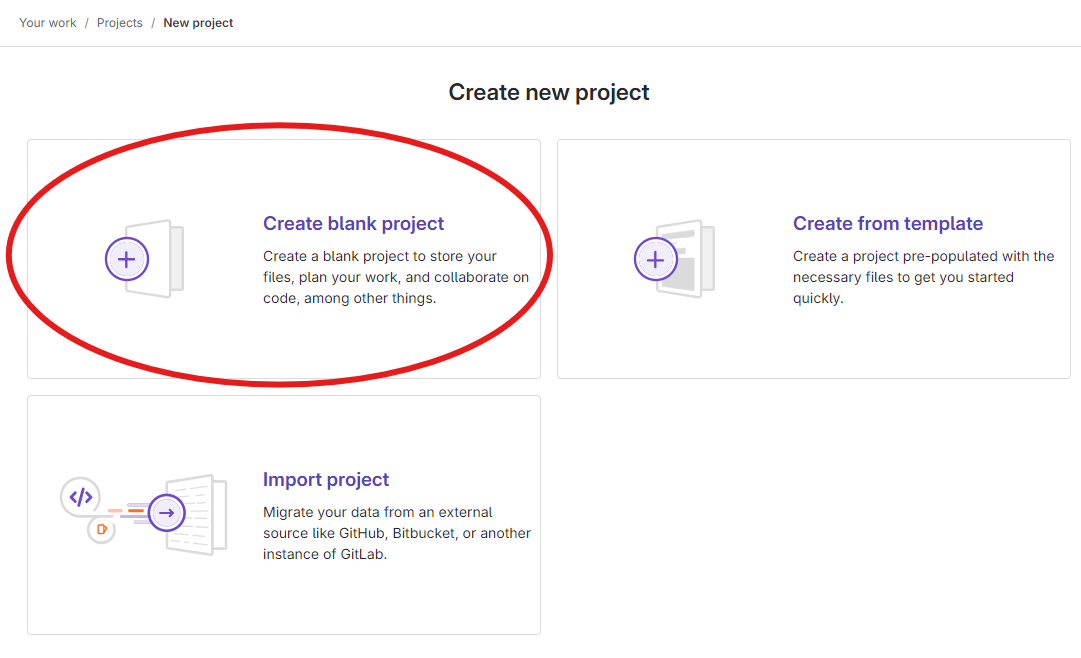
Figure 3
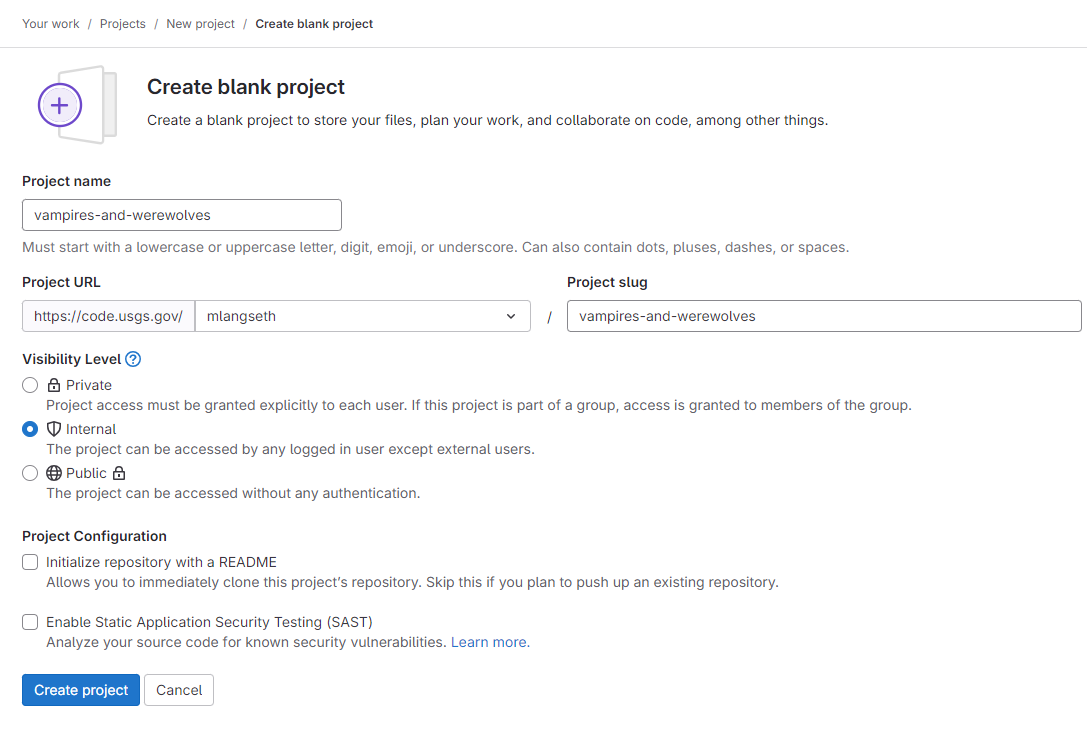
Figure 4
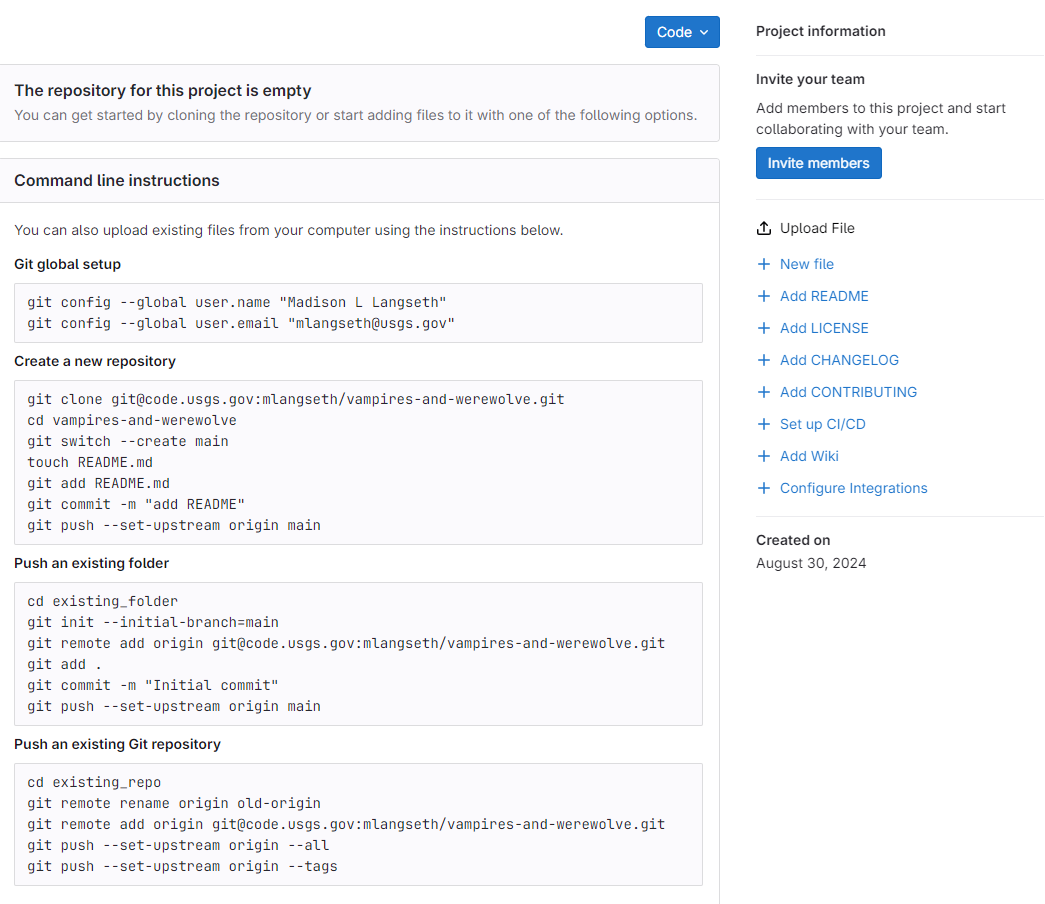
Figure 5
Figure 6
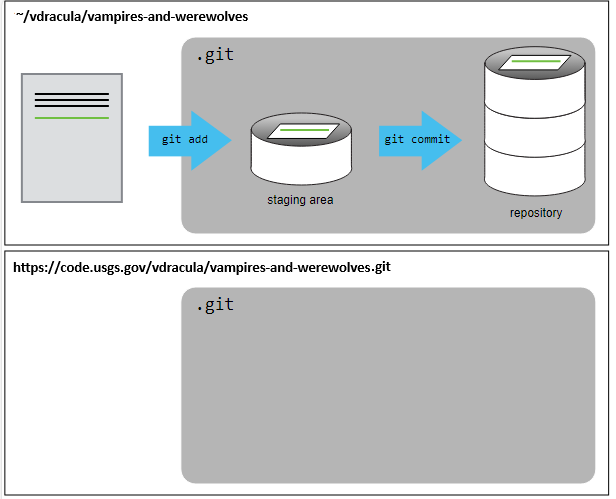
Figure 7
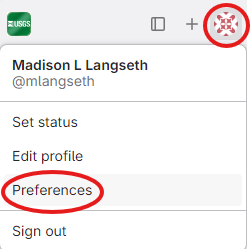
Figure 8
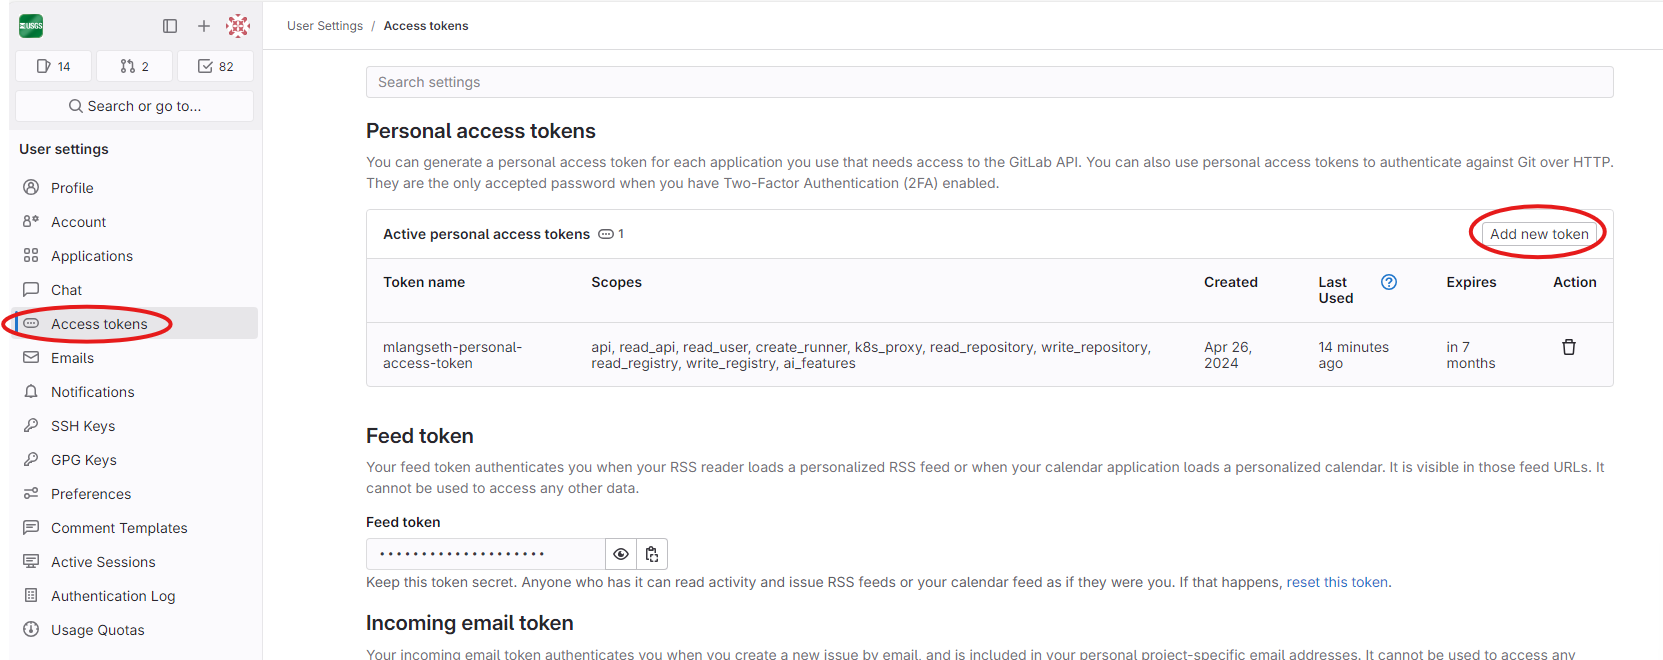
Figure 9
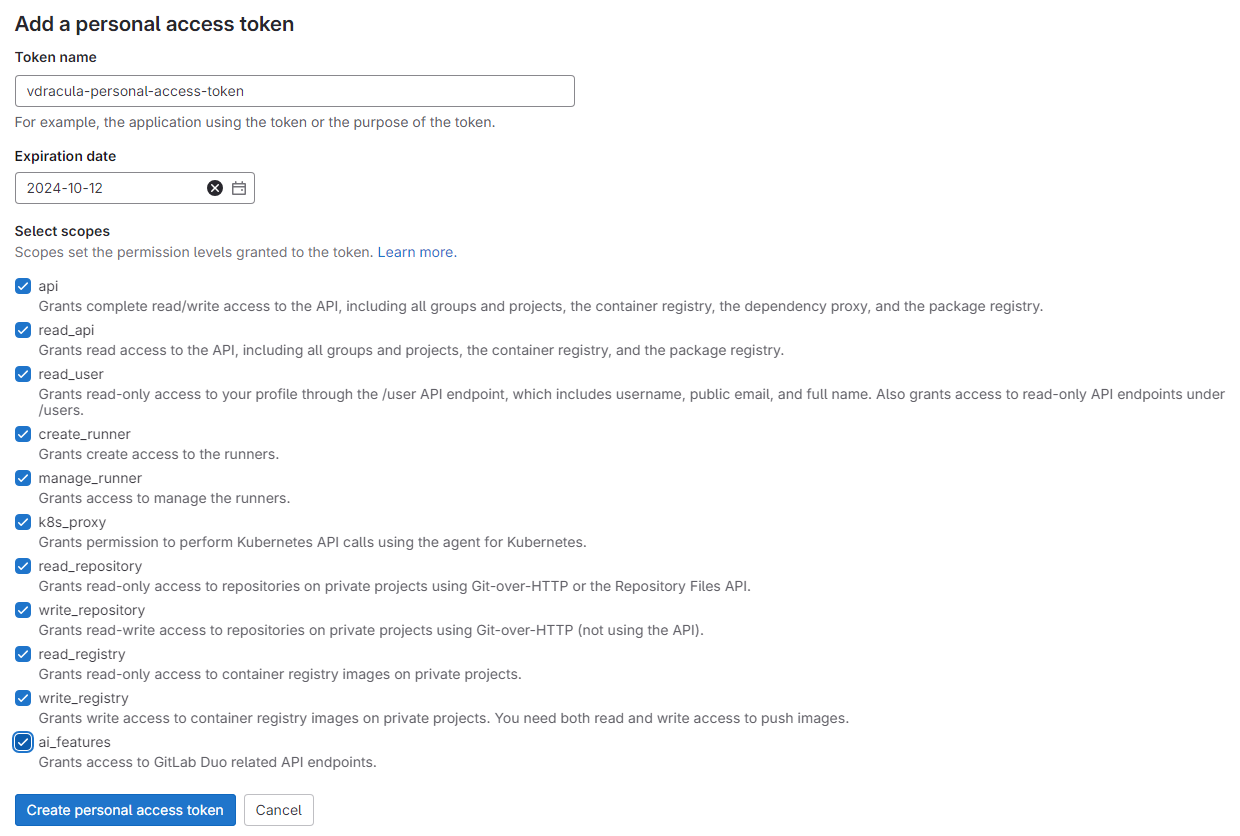
Figure 10
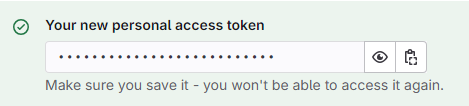
Figure 11
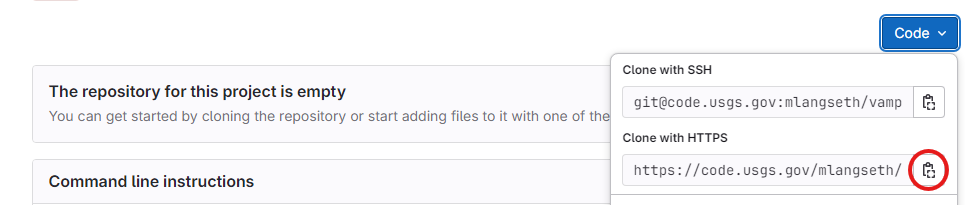
Figure 12
Exploring History
Figure 1
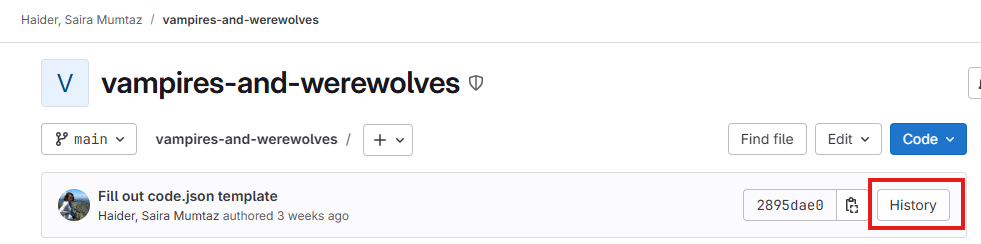
Screenshot showing where to click ‘History’ in
the GitLab repository main page
Figure 2
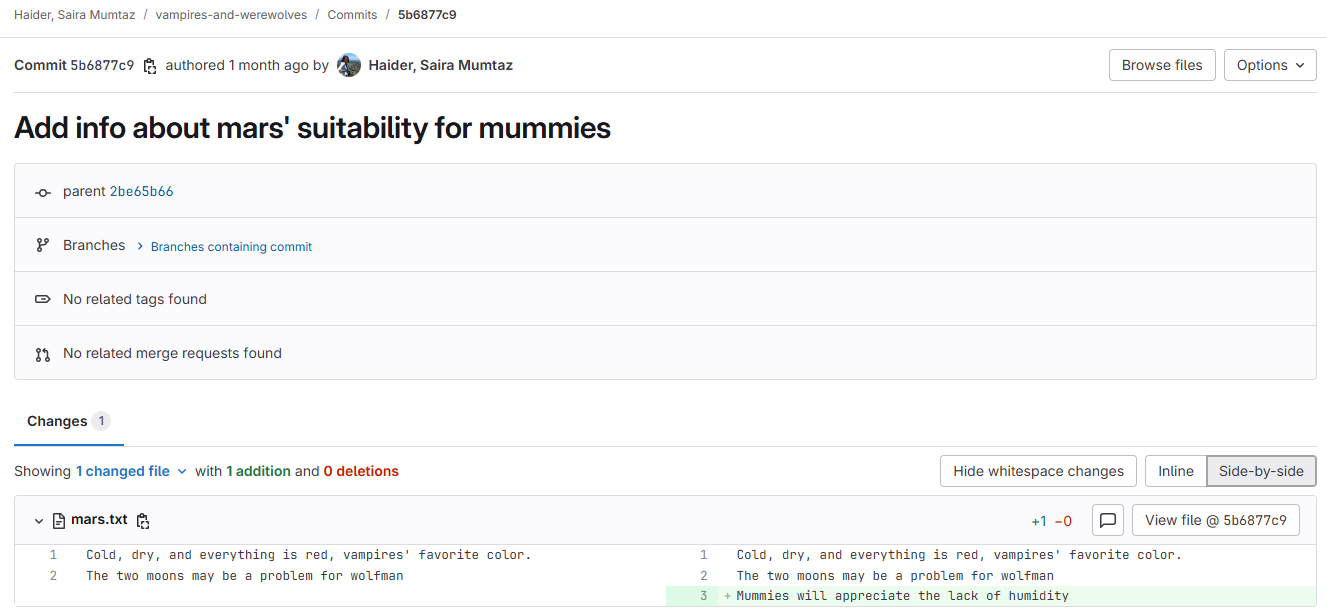
Screenshot showing GitLab’s commit diff
interface
Branching and Merging
Figure 1
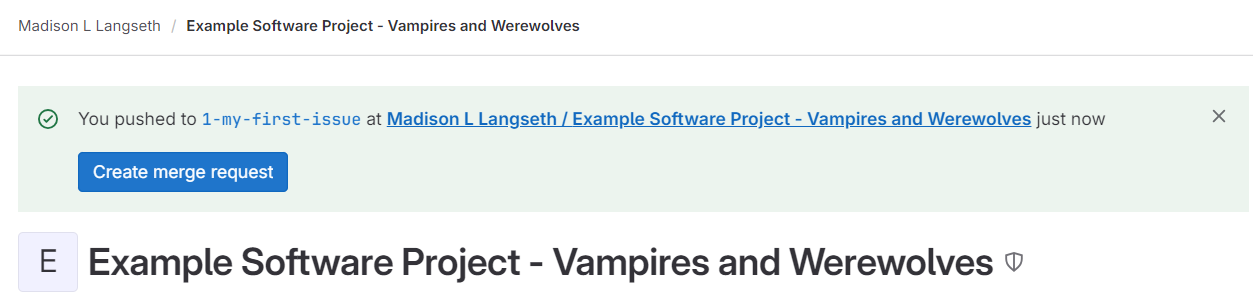
Figure 2
Collaborating
Figure 1
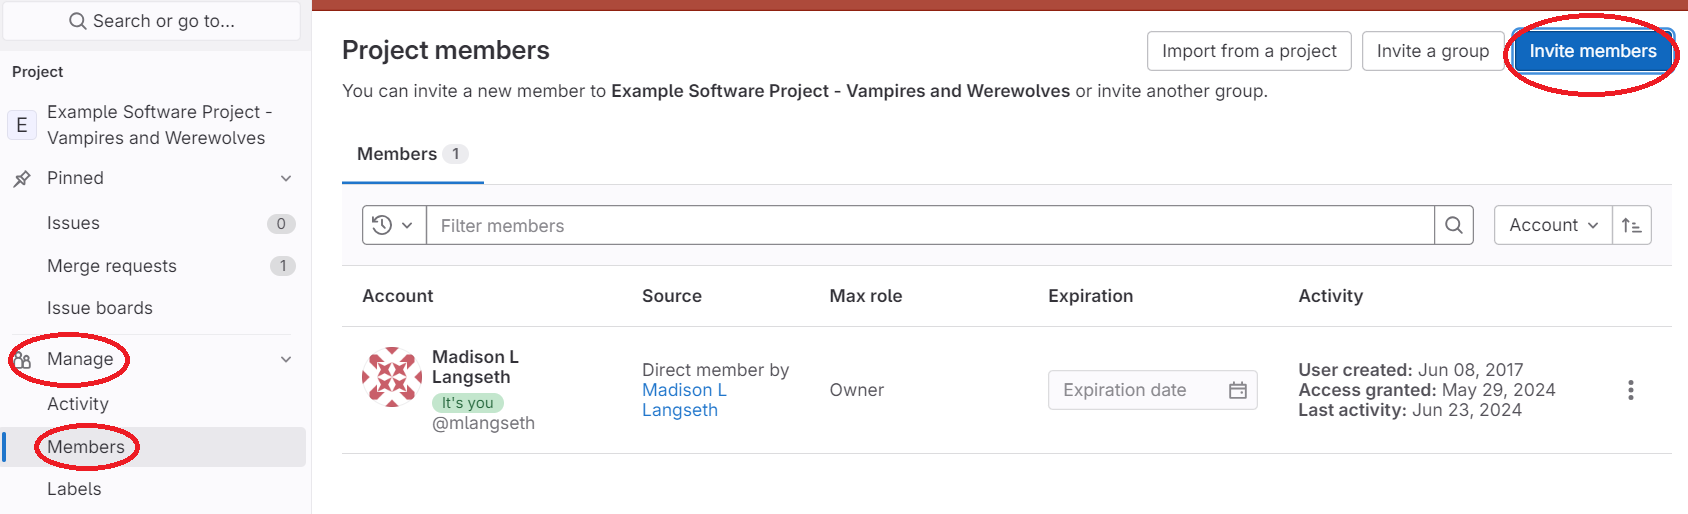
Figure 2

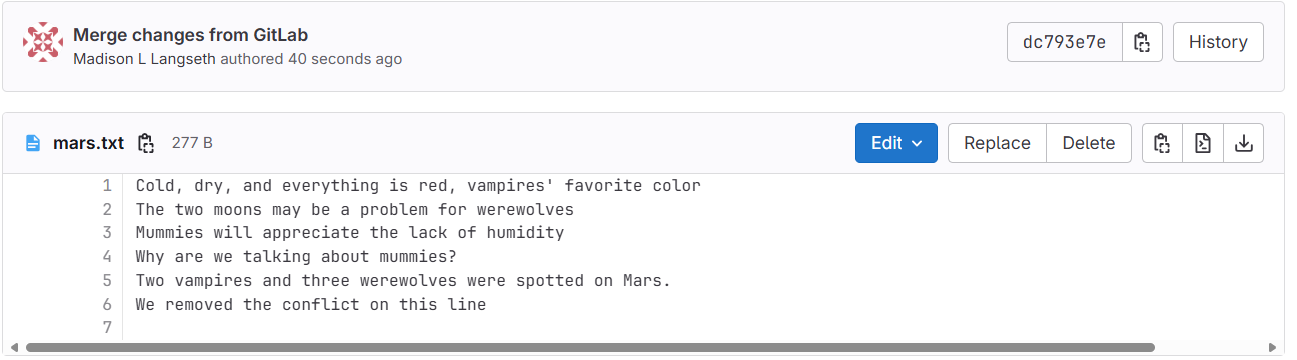
Conflicts
Figure 1
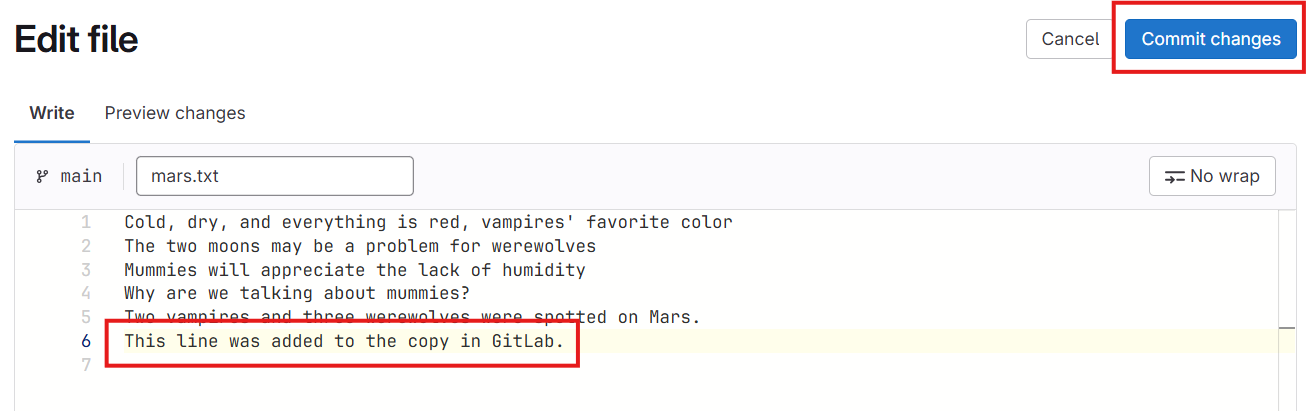
Figure 2

Figure 3
Open Science
Policy
Licensing
Citation
Commonly Included Files
Figure 1
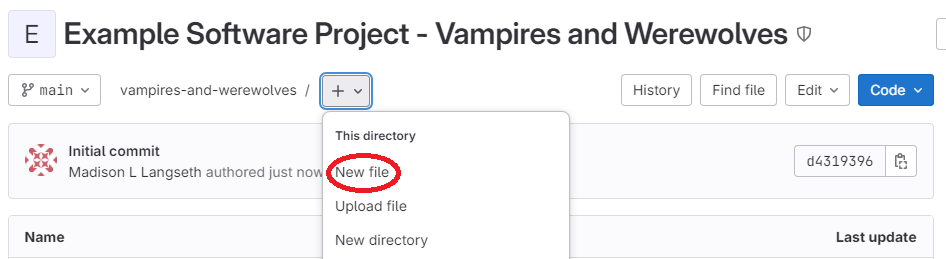
Screenshot of adding a new file to a GitLab
repository
Figure 2
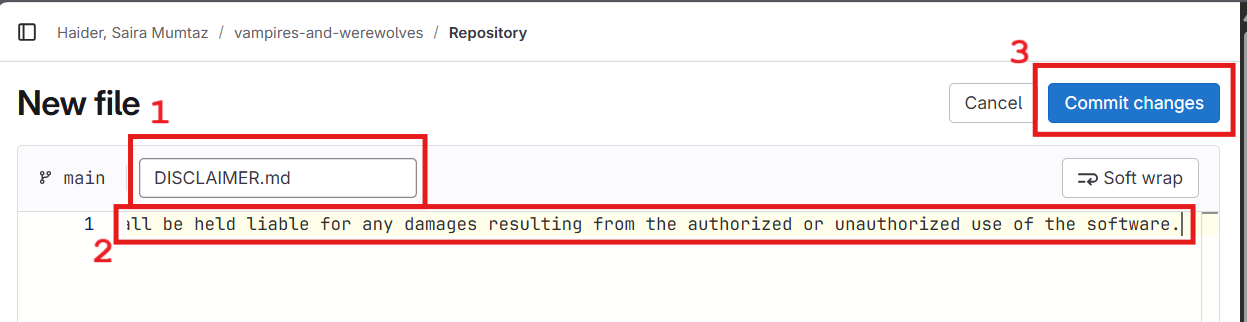
Screenshot of renaming the file, the pasted
text, and the commit button with numbers indicating the order of
tasks
Figure 3
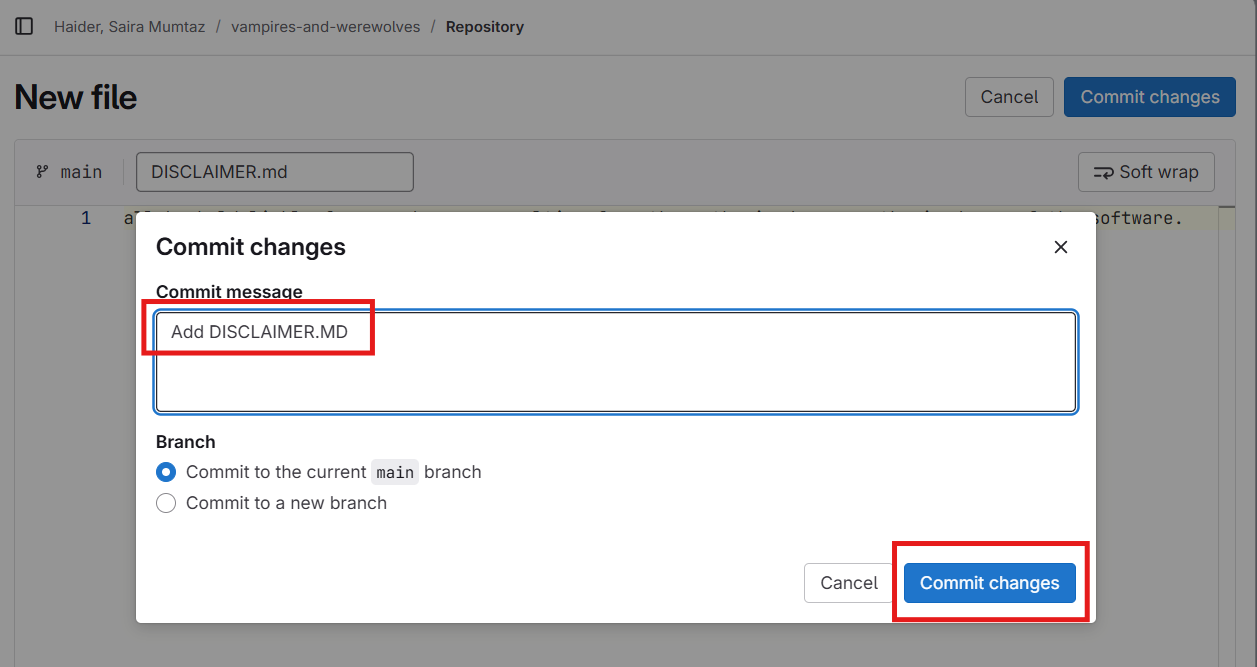
Screenshot of the commit message
Creating Metadata
Figure 1
Screenshot of adding a new file to a GitLab
repository
Figure 2
Screenshot of adding a new file to a GitLab
repository
Figure 3
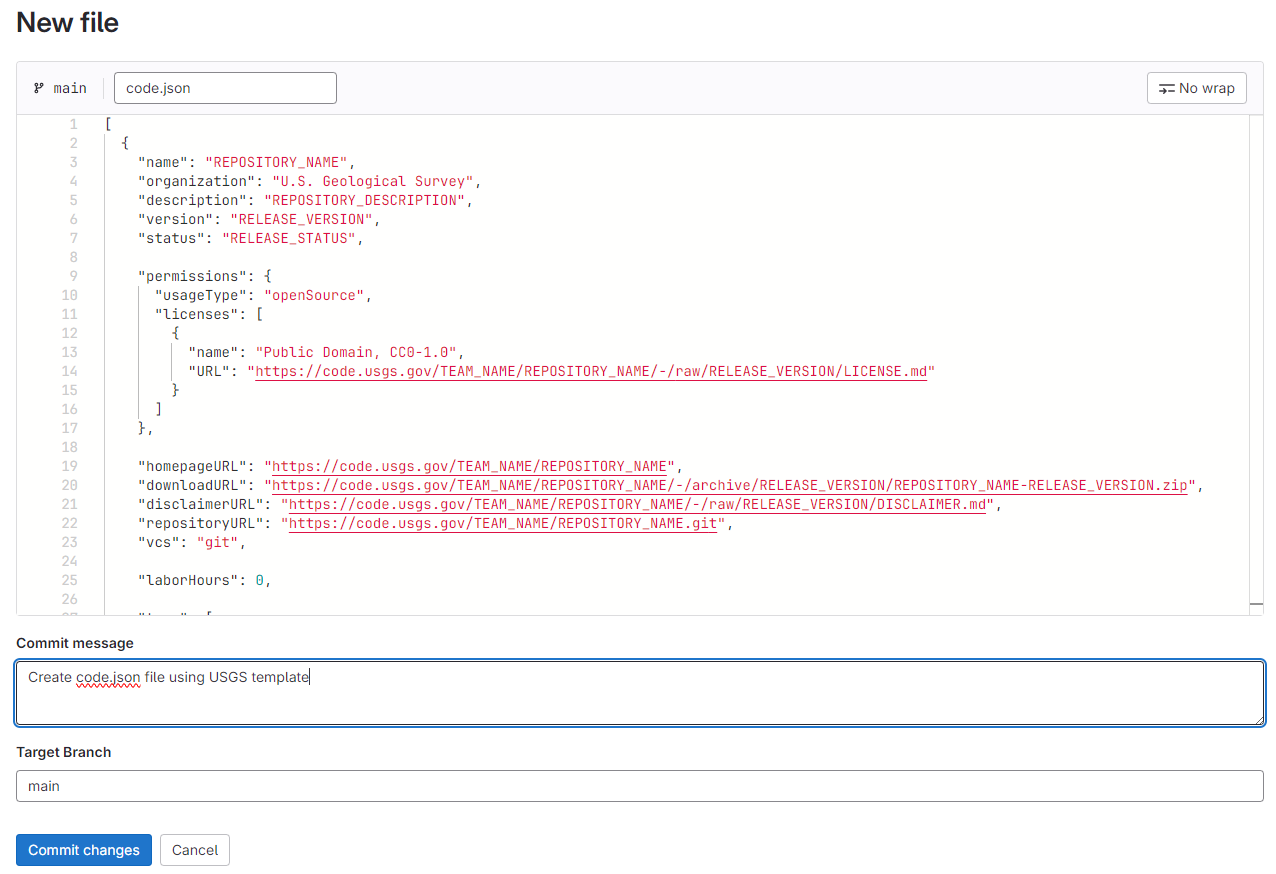
Screenshot of adding a code.json template to a
GitLab repository
Figure 4
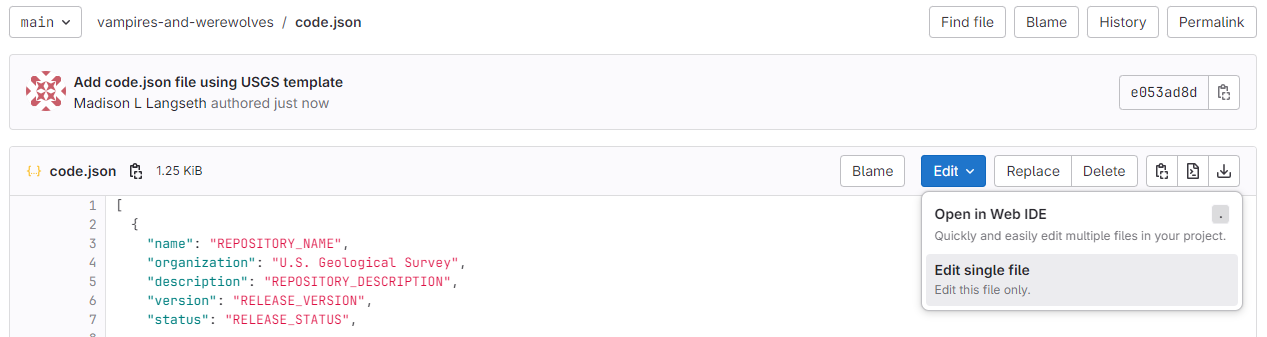
Screenshot of editing a file in GitLab
Figure 5
raw variant of the file, which provides
access to the plain text of the file and not the GitLab-formatted text.
To get the raw variant of a file, click into the file, and
click the Open raw button next to the Download
button: 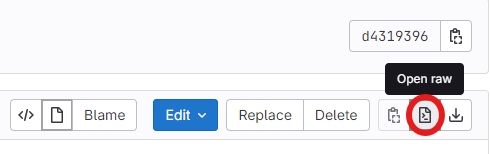
Figure 6
Code–> right click zip (under
Download source code) –> Copy Link: 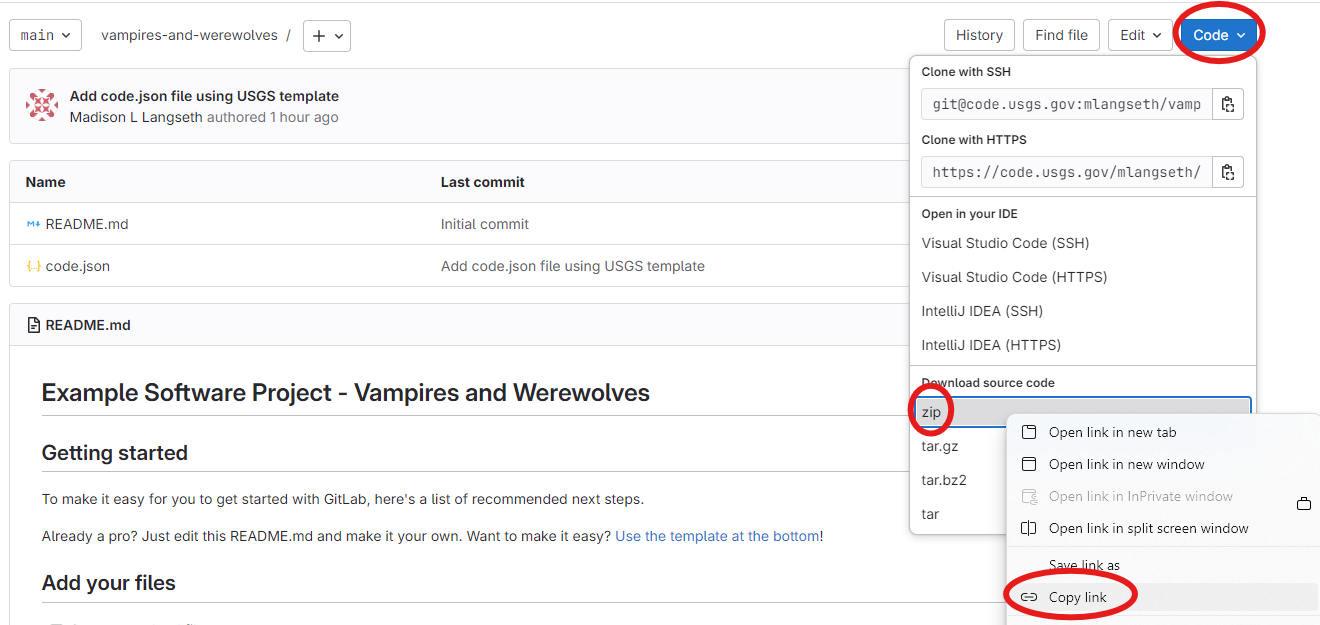
Figure 7
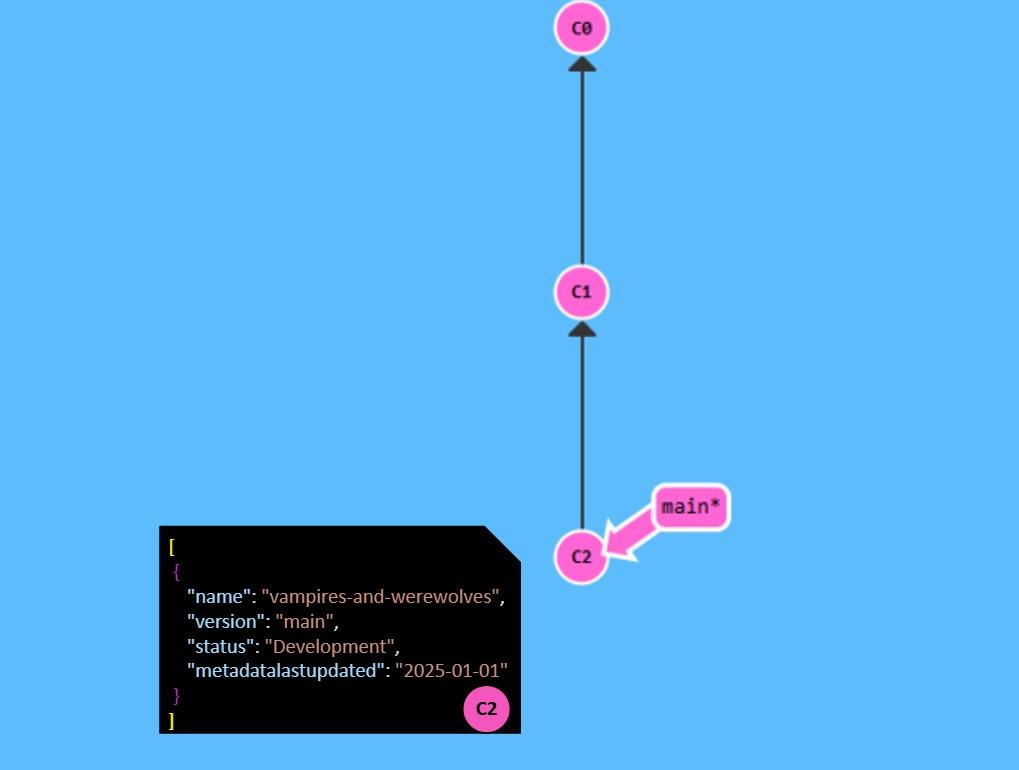
Diagram demonstrating the git flow for the
creation of the initial
code.json in the main
branch of a repository. Please note that time progresses from top to
bottom and arrows point to where the commit originated. The circle on
the code.json indicates the commit where that version of
the code.json file was created.Figure 8
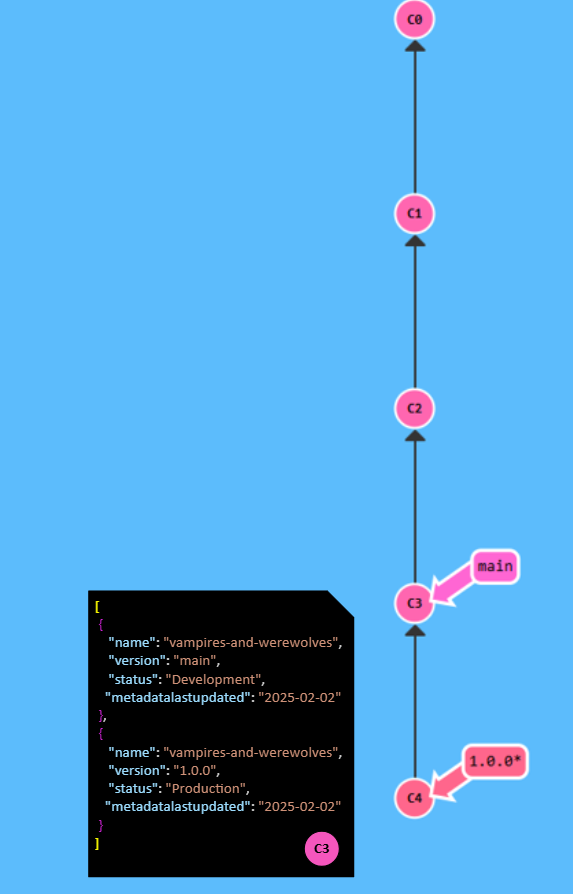
Diagram demonstrating the git flow for the
addition of version
1.0.0 metadata in
code.json, creation of the release candidate branch, and
update of the DISCLAIMER file in branch 1.0.0.
Please note that time progresses from top to bottom and arrows point to
where the commit originated. The circle on the code.json
document indicates the commit where that version of the
code.json file was created.Figure 9
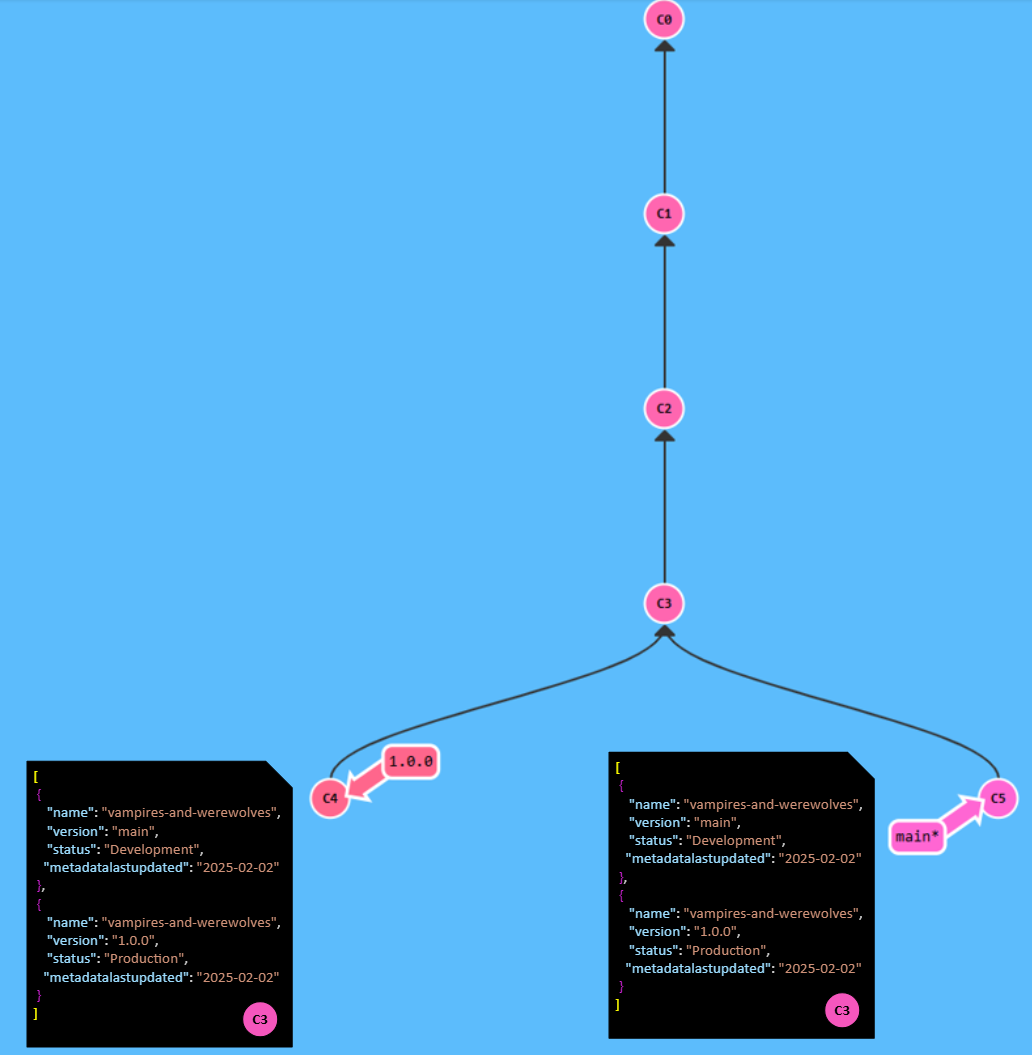
Diagram demonstrating the git flow for the
continued development in the
main branch after the release
of version 1.0.0. Notice that the code.json in
1.0.0 and main are still the same. Please note
that time progresses from top to bottom and arrows point to where the
commit originated. The circle on the code.json document
indicates the commit where that version of the code.json
file was created.Figure 10
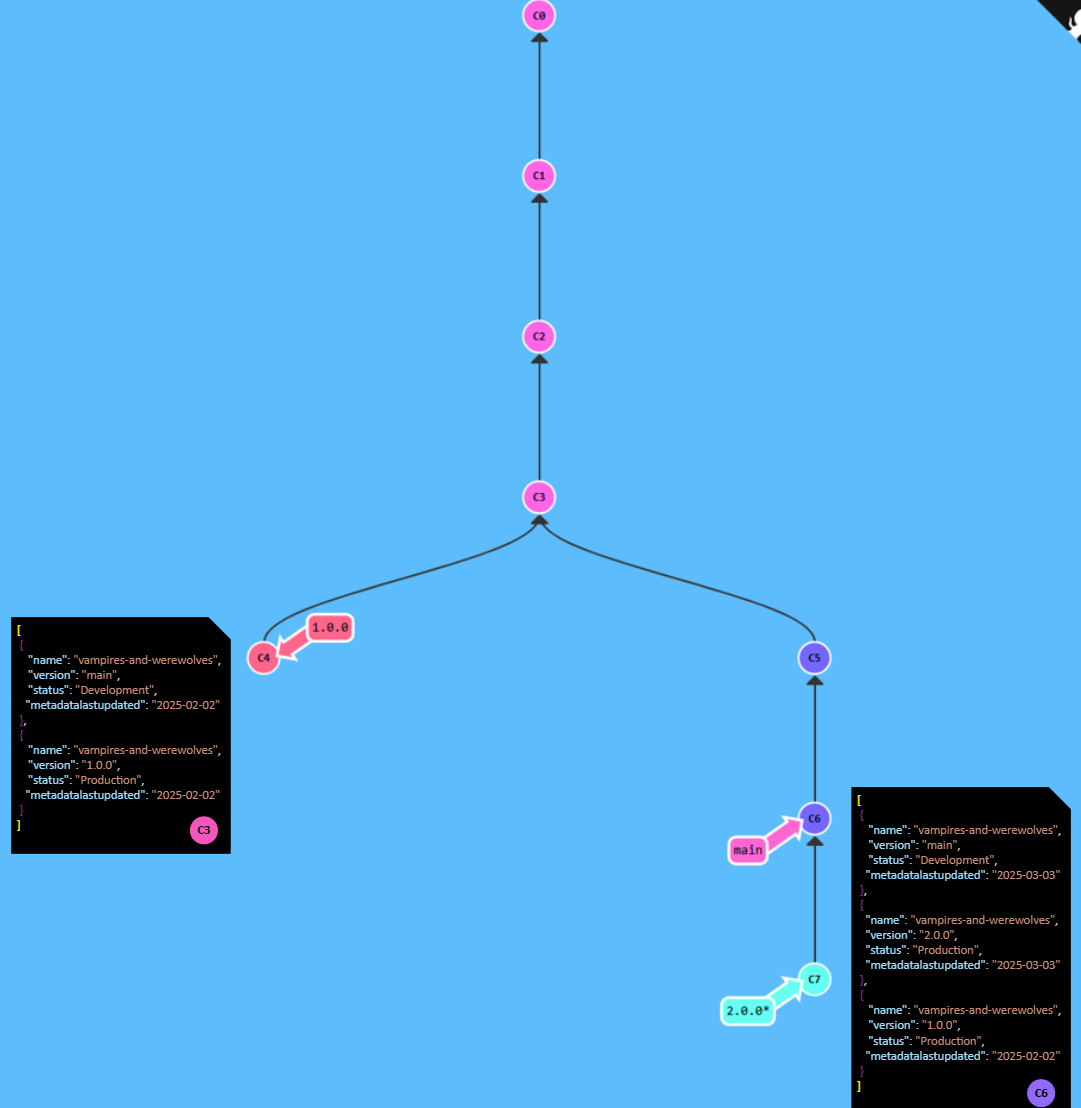
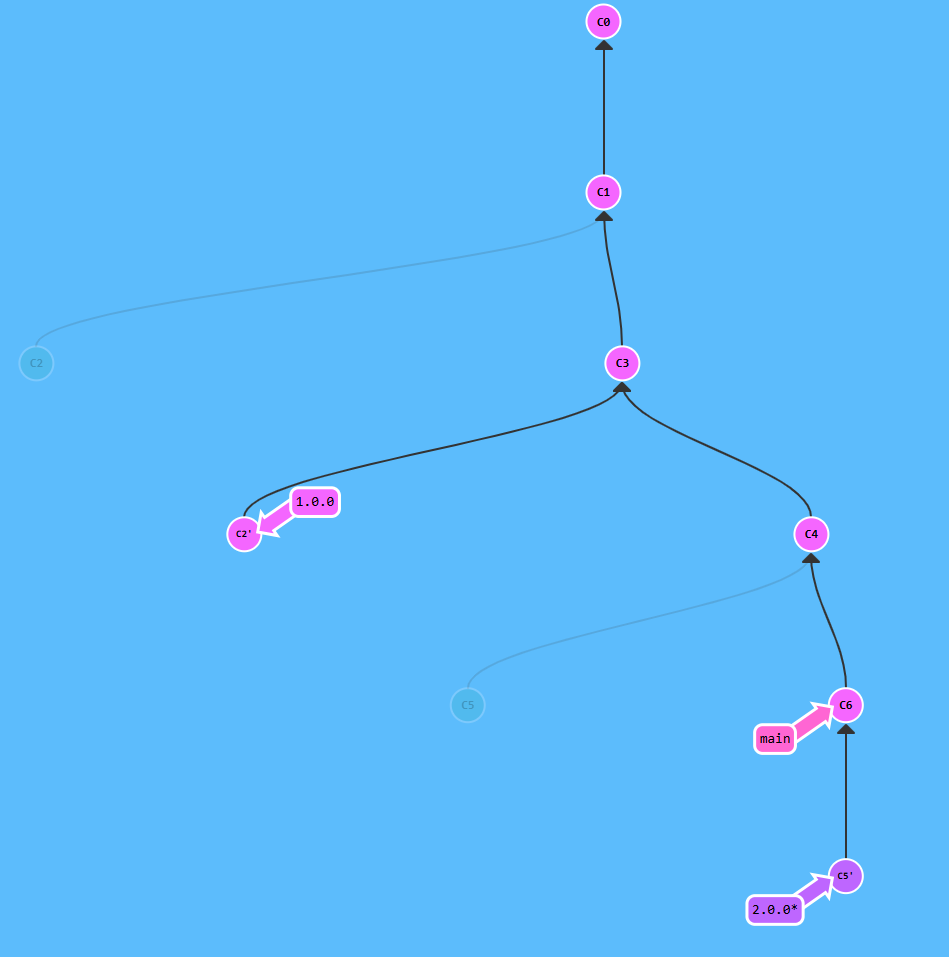
Diagram demonstrating the git flow for the
addition of version
2.0.0 metadata in
code.json, creation of the release candidate branch, and
update of the DISCLAIMER file in branch 2.0.0.
Notice that the code.json files in 2.0.0 and
main are now different from the code.json file
in 1.0.0. Please note that time progresses from top to
bottom and arrows point to where the commit originated. The circle on
the code.json document indicates the commit where that
version of the code.json file was created.Software Review for Authors
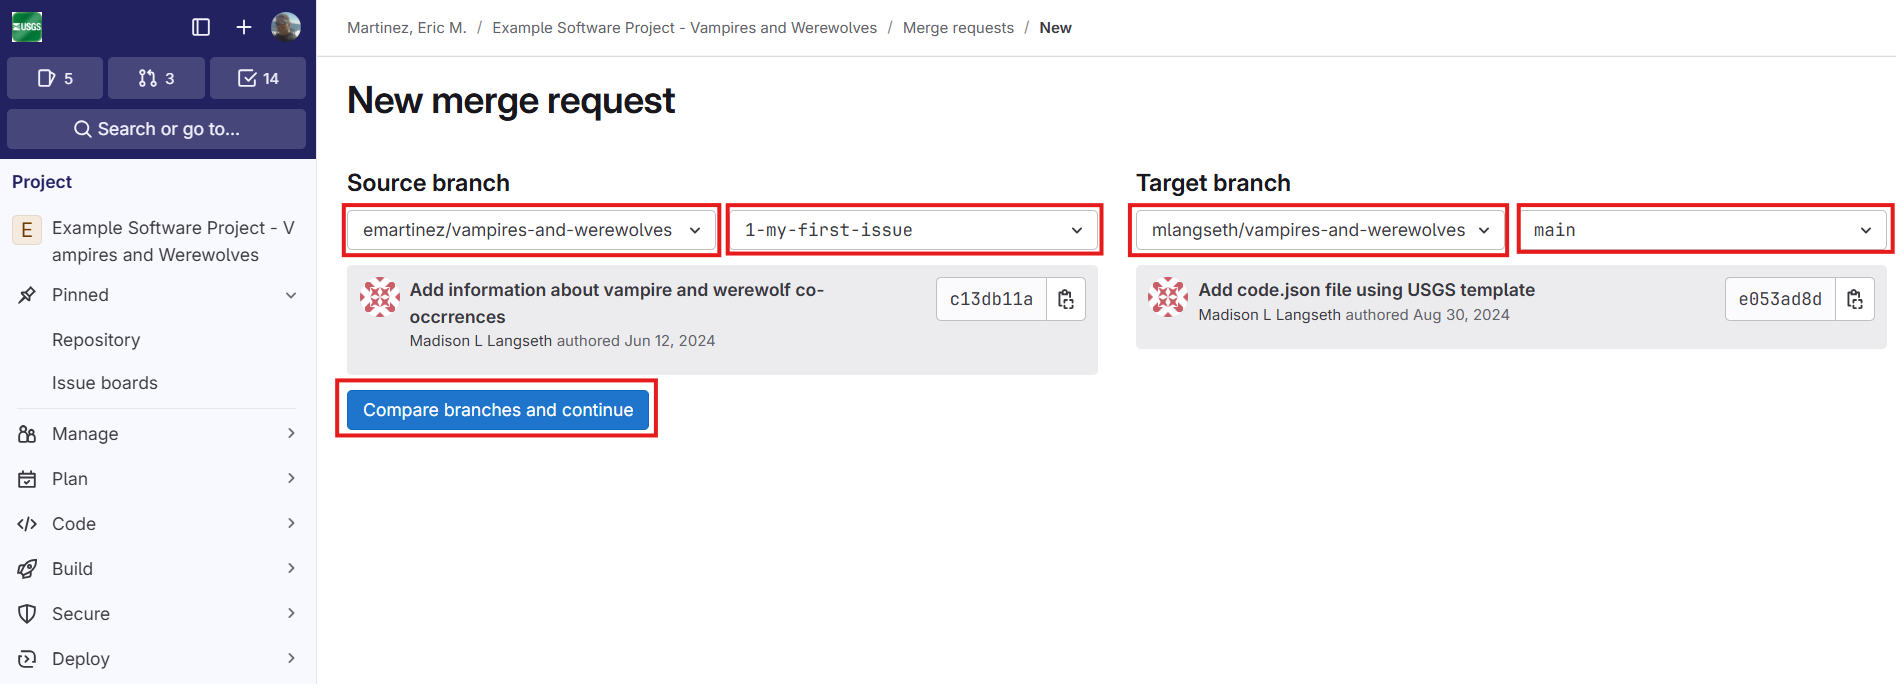
Figure 1
Navigate to Merge requests in the GitLab side
navigation and select New merge request: 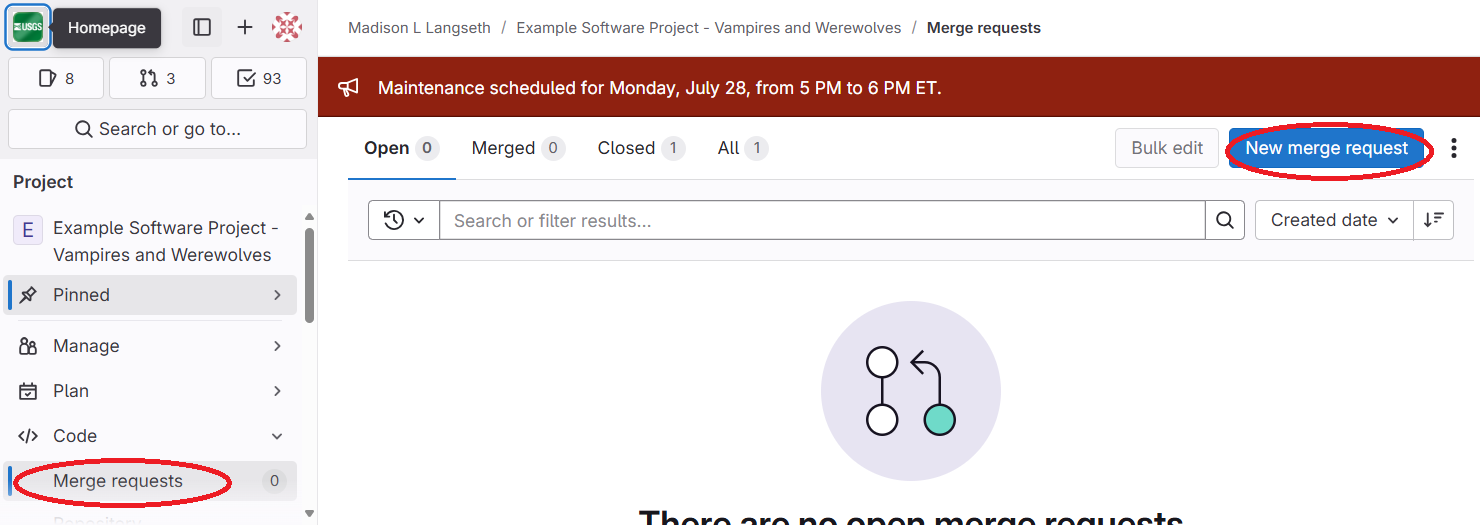
Figure 2
Select main as the source branch and
1.0.0 as the target branch: 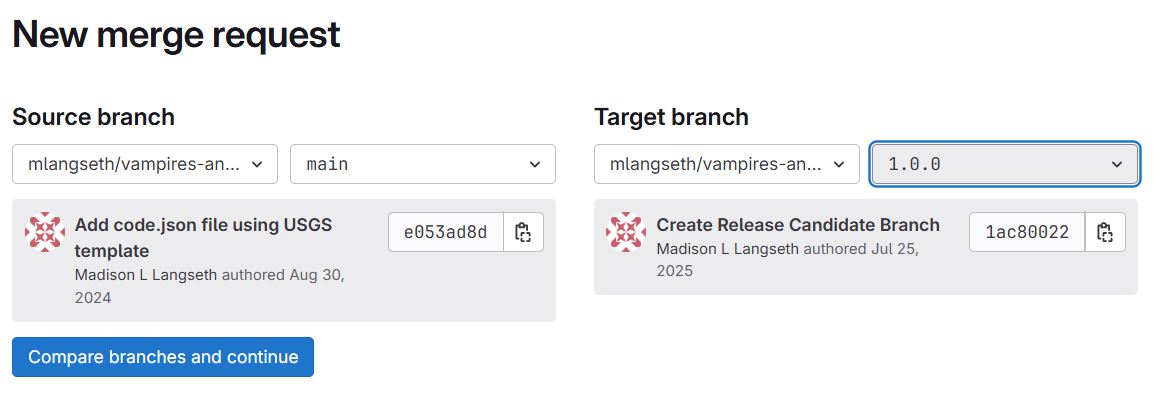
Figure 3
Software Review for Reviewers
Figure 1
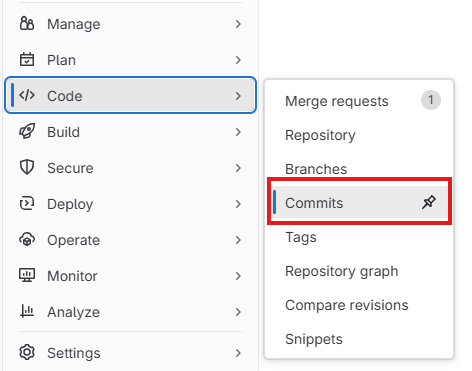
Figure 2
Copy commit SHA 
Figure 3
Click Comment 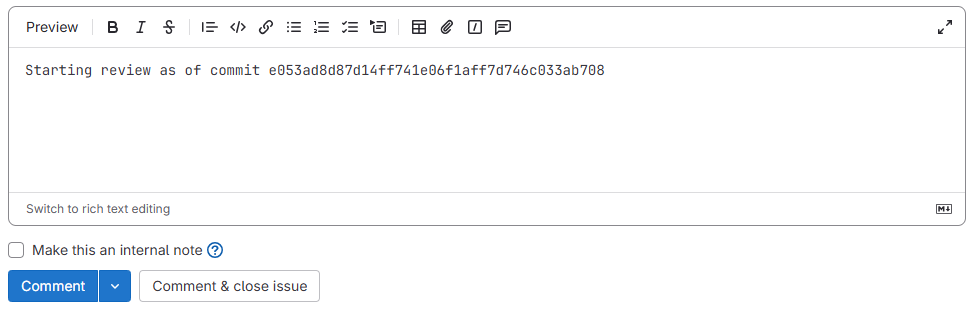
Figure 4
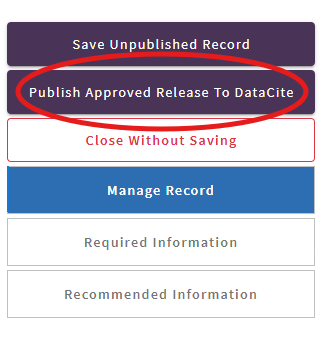
Publishing
Figure 1
“Diagram demonstrating the git flow for updating
a release candidate branch. Please note that time progresses from top to
bottom and arrows point to where the commit originated.”
Figure 2
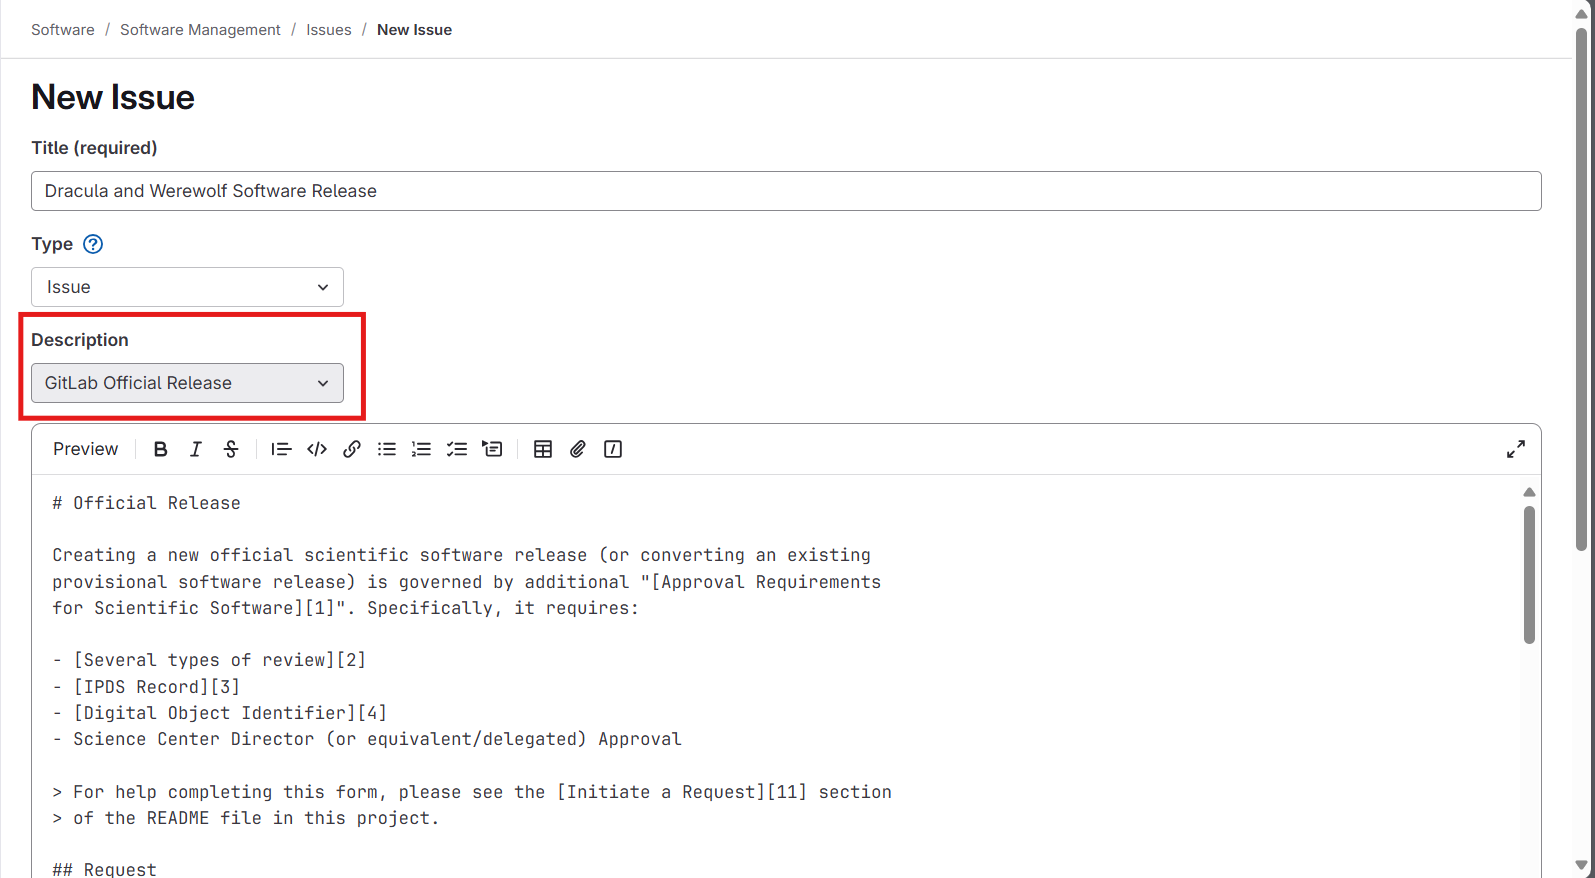
Figure 3
Figure 4
Figure 5
Figure 6

Figure 7
Figure 8
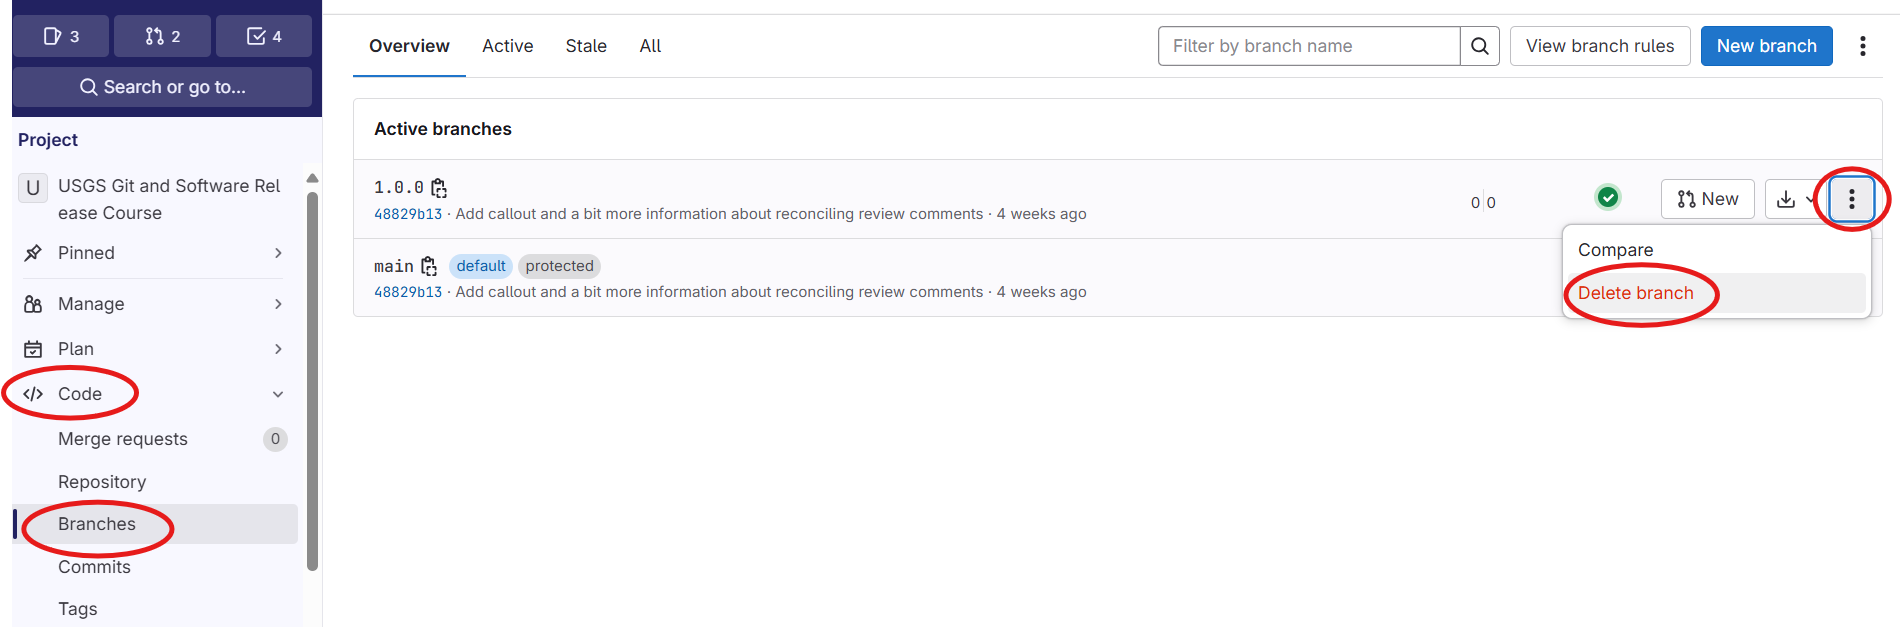
Figure 9
Continuing Your Project
Figure 1
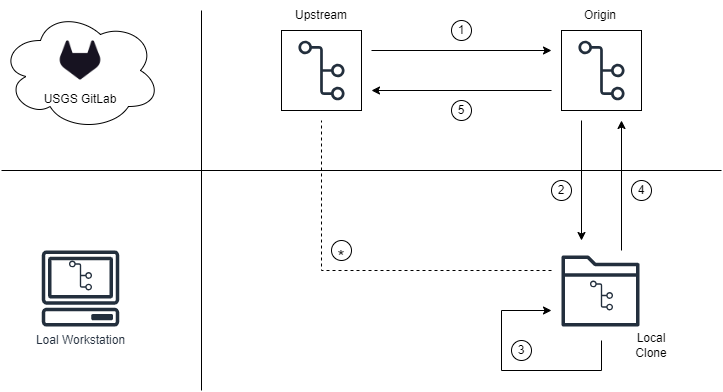
Forking Workflow Diagram
Figure 2
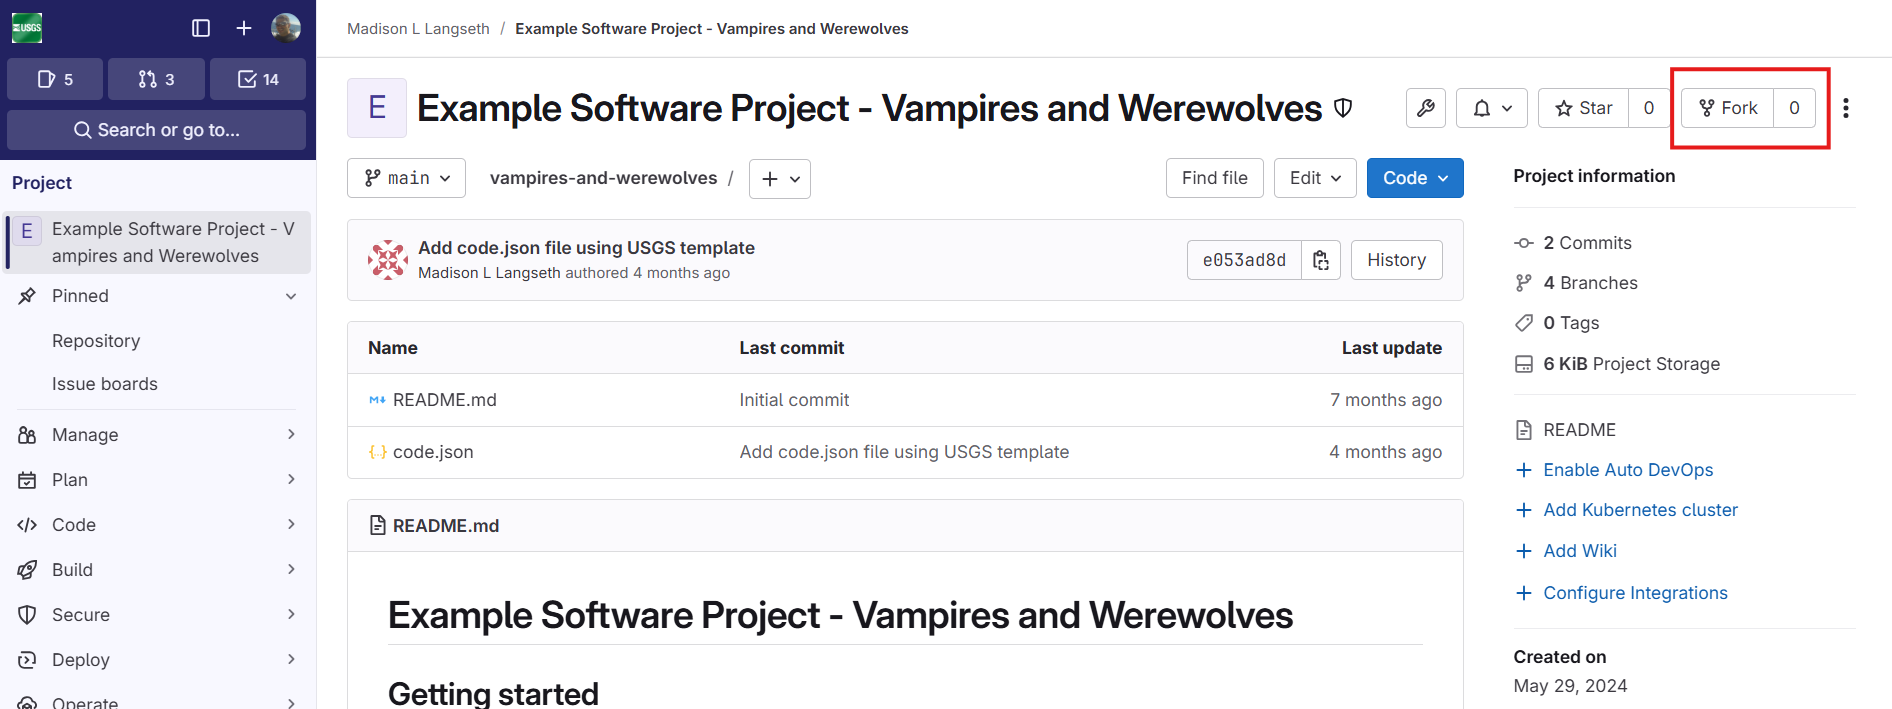
Figure 3
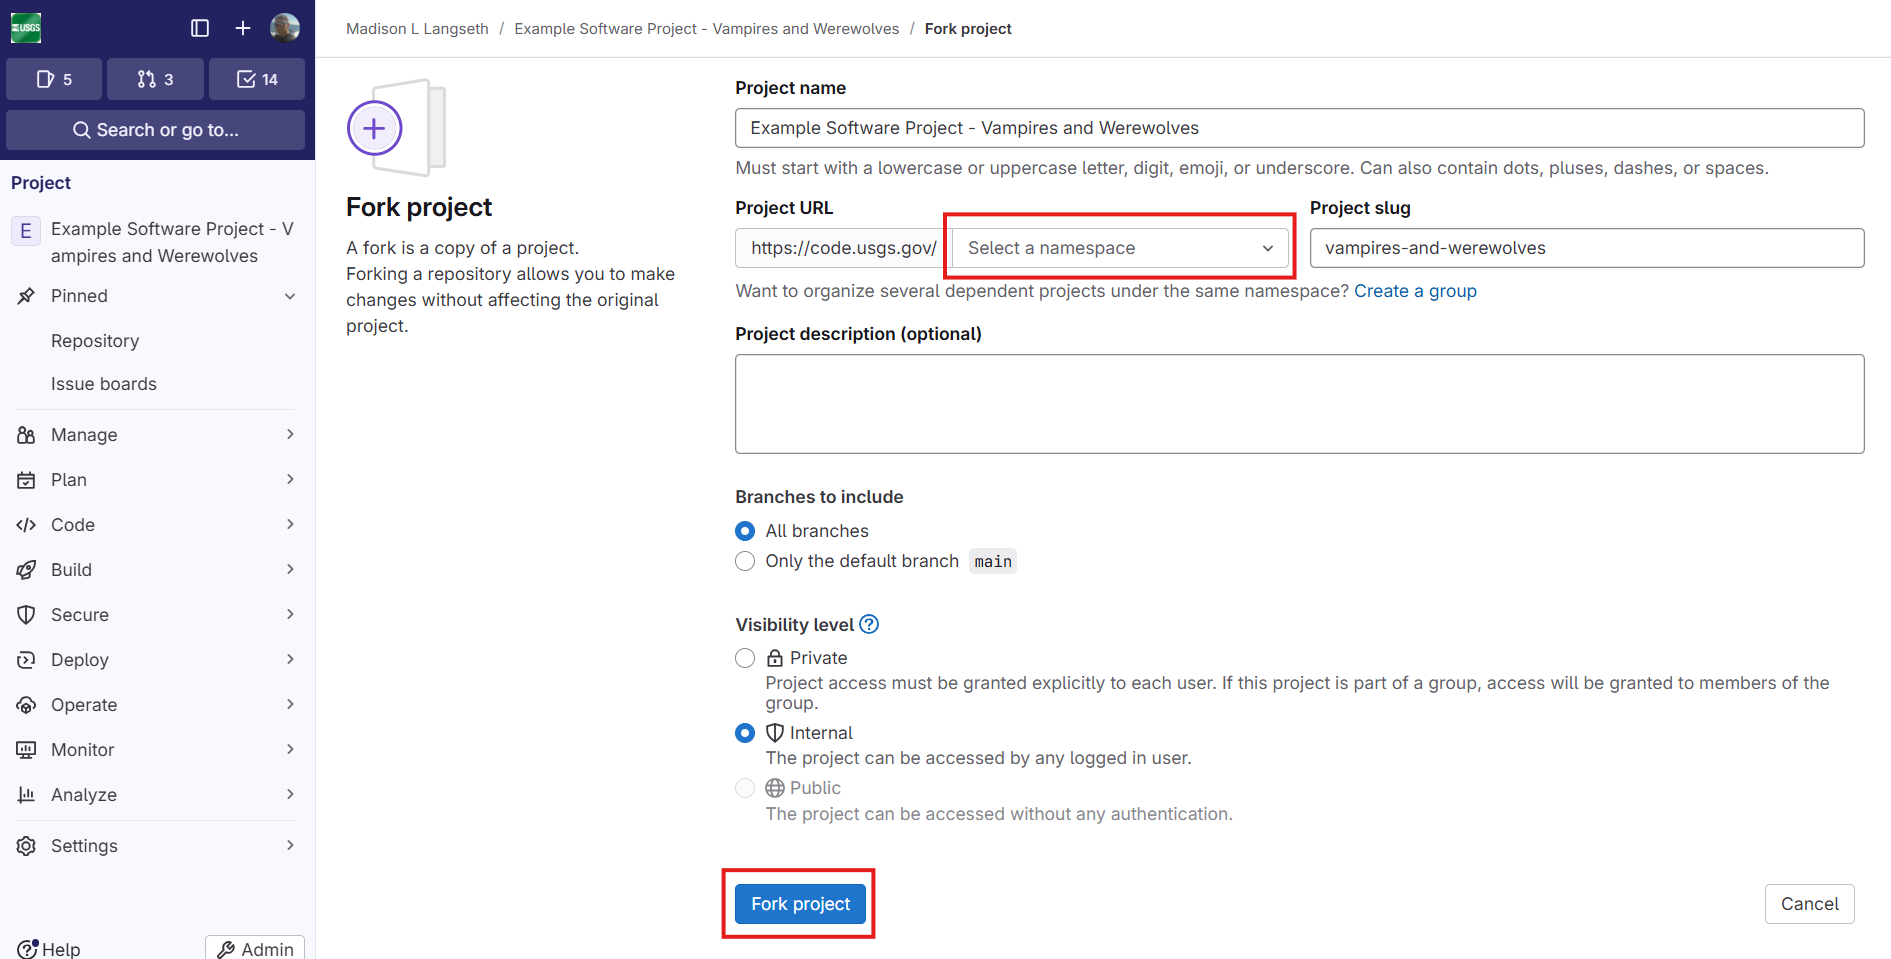
Figure 4
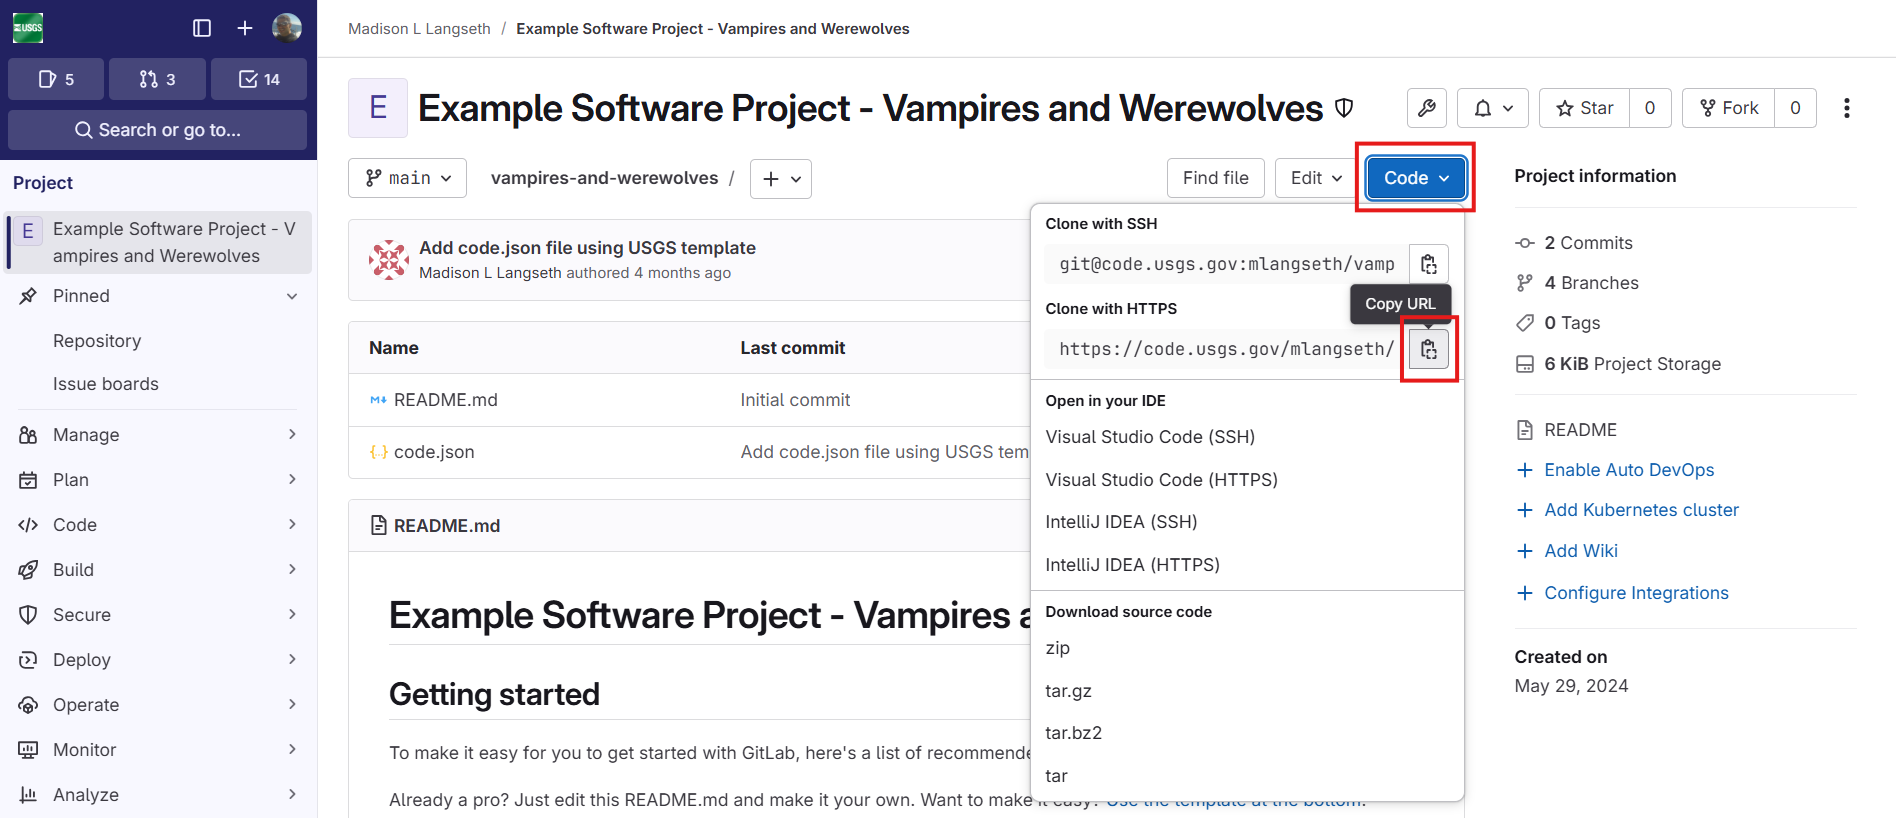
Figure 5

Figure 6